Chapter 01
Introduction
ATELIER is a private workshop for car enthusiasts. It helps you plan, document and maintain every machine in your collection — from the first nut to the final dyno run — with the precision of a bespoke atelier.
What you can do
- Catalogue every car you own or dream of owning.
- Plan parts and upgrades with budgets, vendors and links.
- Log ordinary and extraordinary maintenance, with due dates.
- Build a visual roadmap of your project with photos.
- Attach invoices, receipts and documents to every entry.
- Share public builds on the Social feed and join Crews.
Key benefits
- Total ownership cost in one place — no more spreadsheets.
- Never miss a service with overdue alerts.
- Multi-language (EN / IT) and multi-currency ($/€).
- Guest mode — try the app fully offline before signing up.
Note
Chapter 02
Getting Started
1. Create your account
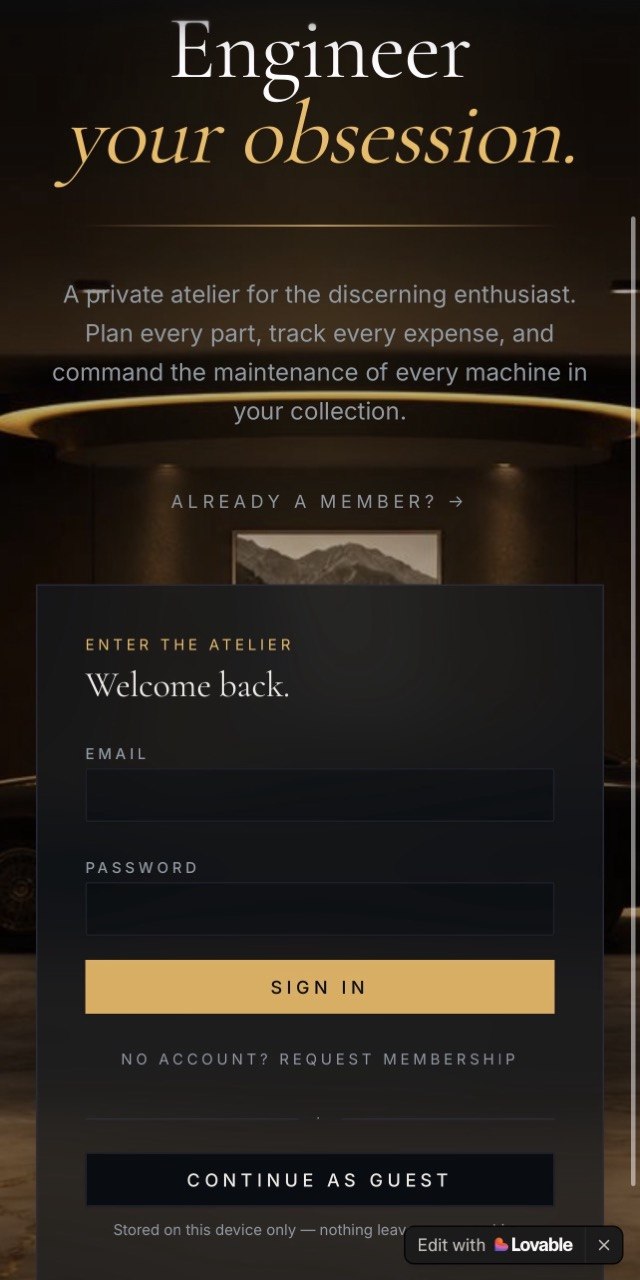
- Open the app — you will land on the welcome screen.
- Click Request membership to switch to sign-up.
- Enter a display name, your email and a password (min. 6 characters).
- Check your inbox and confirm your email to activate the account.
- Return to the app and Sign in.
Tip
2. Accept the Terms & Conditions
On first access a modal will ask you to accept the Terms & Conditions. Read the document, tick the checkbox and click Accept. You will not see this dialog again unless the terms are updated.
3. Set your preferences
Use the top-right controls (or the settings sheet on mobile) to choose:
- Units — miles or kilometres.
- Currency — US dollar or Euro.
- Language — English or Italian.
- Theme palette — Atelier, Most Wanted, Cyberpunk.
- Appearance — light or dark mode.
Important
Chapter 03
User Interface Overview
The header
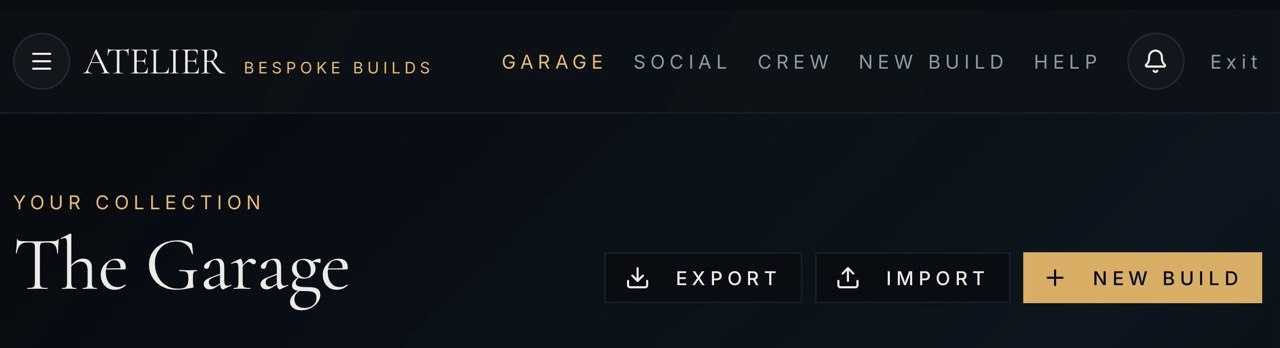
The sticky header is your command center. From left to right you will find:
- Menu — opens the settings sheet on mobile.
- ATELIER logo — returns to your garage.
- Main navigation — Garage · Social · Crew · New Build.
- Notifications bell — friend requests and crew invites.
- Exit — sign out or leave guest mode.
Tip
Main screens
- Garage — list of all your cars.
- Car detail — specs, parts, maintenance, pictures and attachments.
- Social — public feed of community builds.
- Crews — private circles you create or have been invited to.
- Account — profile, nickname, privacy, friends, password.
Icons you should recognise
- 🔔 Bell — pending notifications.
- ⚙ / ☰ Menu — open the settings sheet.
- ☀ / 🌙 — toggle light / dark mode.
- 🎨 Palette — switch the theme.
- 🔥 Flame — give "hype" to a build on Social.
Chapter 04
Core Features
The Garage
Your garage lists every car. Click any card to open its detail page, or use New Build to add one.
Add a car — example
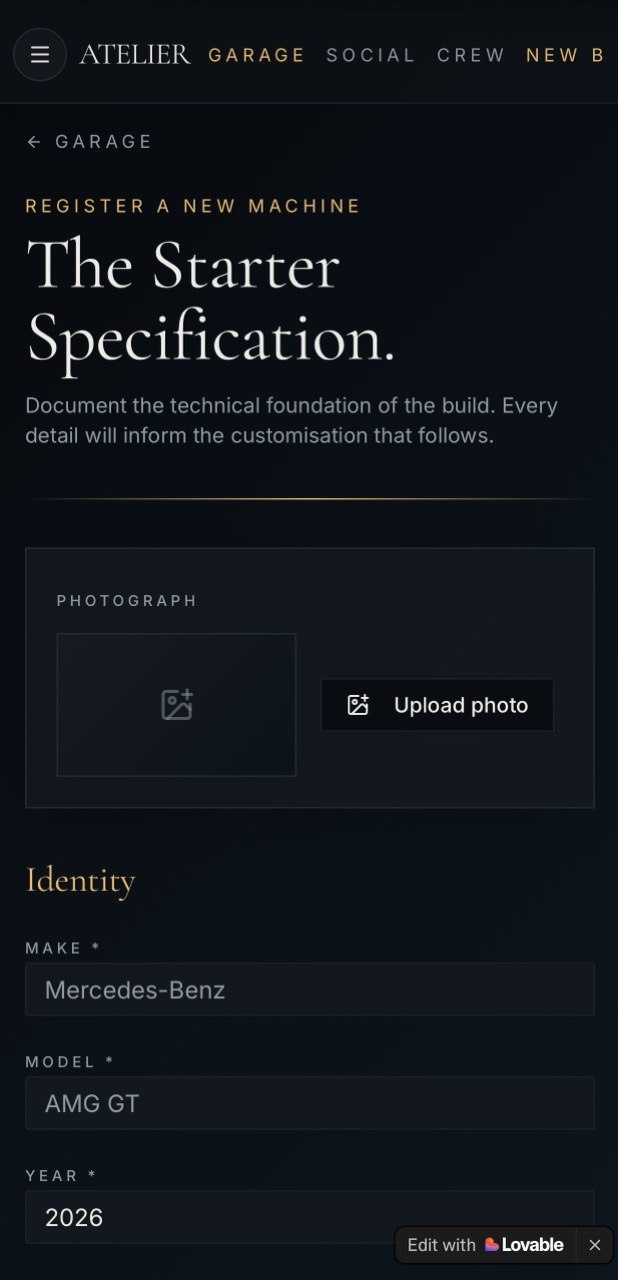
- Open Garage → New Build.
- Fill in Identity (make, model, year, trim, VIN).
- Fill in Powertrain (engine, transmission, drivetrain).
- Fill in Appearance (color, mileage).
- Optionally upload a hero photo.
- Toggle Currently owned on if you actually own it.
- Click Register Build.
Parts & build planning
Each part has a status that drives your budget:
- Stock — the factory component currently fitted.
- Planned — something you intend to buy (uses planned cost).
- Upgraded — already installed (uses actual cost).
Add a vendor, install date, external link (Amazon, manufacturer page, forum thread) and notes for full traceability.
Maintenance
Log Ordinary services (oil, filters, brake fluid…) andExtraordinary ones (clutch, timing belt, engine rebuild). Add the date performed, mileage at service and the next due date. Owned cars receive overdue alerts at the top of the detail page.
Warning
Pictures roadmap
Use the Pictures tab to add a chronological visual log of milestones — coilovers installed, first paint test, dyno day. Each picture has a date and a caption.
Attachments
On any part or maintenance entry, click Add file to attach invoices, receipts or photos (max 25 MB). Attachments are always private, even when the car is public on Social.
Social
Make a car public from the Social section of its detail page. The car will appear in the public feed where members can give it hype. You can also choose whether to share parts and maintenance details — your attachments always remain private.
Crews
Crews are private circles. Create one, design its crest, then invite members by nickname. Members can see each other's shared content. The owner can transfer ownership or delete the crew.
Account & privacy
Set a unique nickname (3–24 characters) so others can find you. Toggle Private account if you want only friends to see your public cars. Send and accept friend requests from any profile page.
Chapter 05
Professional Account
Upgrade to a Professional account to turn ATELIER into a full shop management system. Pros run a real workshop on top of the same garage, parts and maintenance tools — with extra modules for clients, jobs, invoicing and analytics.
How to upgrade
Public business profile
Pros get a public business page at /u/your-nickname with logo, bio, location and contact info. Customers can find you, see your shared builds and reach out directly.
- Business name, logo & bio — branded landing for your shop.
- Location & public contact — phone, email or website.
- Visibility toggle — hide the profile while you set things up.
Clients (CRM)
A dedicated Clients section lets you keep a private address book of every customer. Each car in your garage can be linked to a client, so the garage view can be grouped or filtered by owner.
- Add clients with name, email, phone and notes.
- Assign one or more cars to each client.
- Group the Garage by client to see the whole portfolio at a glance.
Jobs & invoicing
The Jobs module is a work-order system built around your cars and clients. Every job tracks the full lifecycle from intake to delivery.
- Status pipeline — Intake → In progress → Completed → Delivered.
- Line items — parts and labour with quantity, unit price and totals.
- Payments — record deposits and partial payments; outstanding balance is tracked automatically.
- Client & car link — every job is tied to a client and one of their cars.
- PDF export — generate clean estimates and invoices for your customer.
Analytics dashboard
The Analytics page turns your jobs into a real business dashboard. Switch timeframe (day / week / month / monthly / yearly) and see KPIs and charts update instantly.
- KPIs — revenue, billed, outstanding, jobs done, pending, unique customers.
- Revenue chart — billed vs collected over time.
- Jobs over time — workload trend per period.
- Status pie — share of jobs in each stage of the pipeline.
Pro only
Marketplace boost
Pro builds and listings carry your business branding across Social and Marketplace — buyers know they are talking to a workshop, not a private seller, which builds trust and conversions.
Everything you already love
Personal features are fully included: garage, parts, maintenance, photos, attachments, crews, social feed, multi-currency and multi-language. A pro account is a superset — nothing is taken away.
Chapter 06
Common Workflows
Workflow 1 — Plan a new build from scratch
- Open New Build and register the car (Identity, Powertrain, Appearance).
- Turn on Currently owned if applicable.
- Open the car detail and go to the Parts tab.
- Add the current stock parts you plan to replace (status Stock).
- For every upgrade you want, add a part with status Planned and a planned cost.
- Track the budget at the top of the page — Parts planned shows your forecast.
- When a planned part is installed, edit it: change status to Upgraded, fill in actual cost and install date.
Workflow 2 — Log a maintenance service
- Open the car detail and switch to the Maintenance tab.
- Click Log Service.
- Enter the title (e.g. "Oil change · Mobil 1 0W-40").
- Choose Ordinary or Extraordinary.
- Enter the cost, the date performed and the mileage at service.
- Set the next due date — this powers overdue alerts.
- Save. Optionally attach the invoice as a file.
Workflow 3 — Share a build to the social feed
- Open the car detail page.
- Scroll to the Social section.
- Make the car Public.
- Optionally enable Share build details to expose parts and maintenance.
- Write a caption.
- Click Post to Social.
Important
Workflow 4 — Invite a friend to a Crew
- Go to Crew in the top nav.
- Open an existing crew or create one with New Crew.
- Click Invite member.
- Search by nickname or display name.
- Click Send invite.
- The recipient sees a notification and accepts it from Invitations.
Workflow 5 — Export & import your garage
- Go to Account.
- Click Export to download a JSON backup of your cars, parts and maintenance.
- To restore on another device or account, sign in and use Import.
- Imported data is added to your existing garage — nothing is overwritten.
Chapter 07
Tips & Best Practices
Be consistent with units and currency
Pick your units (mi/km) and currency ($/€) at the start and keep them. Switching mid-project does not retroactively convert past entries.
Use Planned vs Upgraded as a budget tool
Treat Planned as your wishlist and Upgraded as the executed budget. The dashboard splits the totals so you always know what is done and what is still outstanding.
Pro tip
Keep maintenance dates honest
Always fill in Next due. It is the single field that unlocks overdue alerts. Use realistic intervals from your owner's manual, not optimistic guesses.
Attachments are forever
Scan receipts on the spot and attach them immediately. Six months from now you will not remember which shop did that exhaust install.
Privacy first
- Cars are private by default — you have to opt-in to publish.
- Set your profile to Private if you only want friends to see your public cars.
- Attachments are never shared, even on public cars.
Common mistakes to avoid
Avoid
- Forgetting to mark a car as Owned — you will never see overdue alerts.
- Storing important data only in Guest mode on a single browser. Export regularly or sign up to sync.
- Editing an installed part by deleting and recreating it — use Edit Part to preserve history and attachments.
- Leaving the next-due date empty on safety-critical services (brakes, timing belt).
Quick reference
- Add a car → Garage → New Build.
- Add a part → Car detail → Parts → Add Part.
- Log a service → Car detail → Maintenance → Log Service.
- Share publicly → Car detail → Social section → Post to Social.
- Find members → Social → search bar.
- Backup → Account → Export.